How to Install a Wooden Shelf What Tools Do You Need?

Time:2026-10-07 Author:Liam
0%

Installing a wooden shelf looks simple, but small errors can weaken the entire project. The wall may appear flat, yet hidden wiring or uneven plaster can change your plan. This guide explains What tools are needed for DIY wooden shelf installation? It connects each tool with a practical task, from measuring the wall to securing the final bracket.

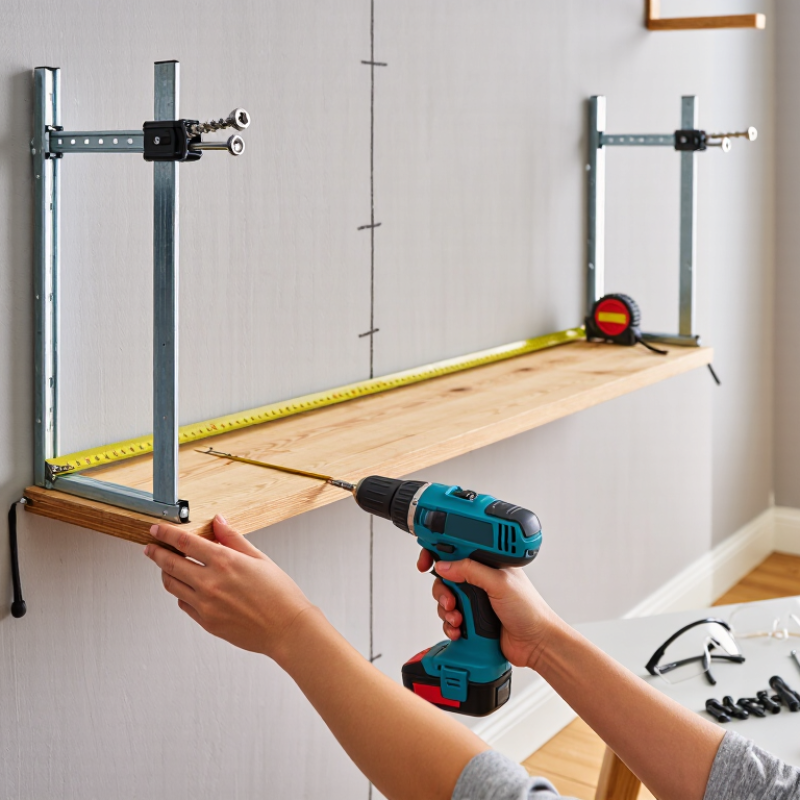
A tape measure, pencil, spirit level, stud finder, drill, and suitable drill bits form the basic toolkit. You may also need a screwdriver, hammer, wall anchors, screws, and safety glasses. For heavier shelves, clamps can hold brackets steady while you check alignment. Norm Abram’s familiar workshop reminder, “Always wear safety glasses,” remains especially important when drilling masonry or cutting timber.

Measure the shelf and mark both bracket positions carefully. Use the level before making any permanent hole. A stud finder can locate solid framing, but it may give unclear readings on thick or textured walls. Check twice. If studs are unavailable, select anchors rated for the shelf’s expected load. Decorative items are light; books are not. The right tools improve accuracy, but they cannot correct rushed decisions or unsuitable hardware. Even experienced DIY installers sometimes discover that a wall is less cooperative than expected. That is part of the work. Pause, reassess, and adjust the method before continuing. This approach protects the wall, the shelf, and anyone standing beneath it.
How to Install a Wooden Shelf What Tools Do You Need?

Tools and Materials Needed for Installing a Wooden Shelf

Installing a wooden shelf requires more than a board and two brackets. The essential tools include a tape measure, pencil, spirit level, stud finder, drill, drill bits, screwdriver, and a small hammer. Use a handsaw only when the shelf needs trimming. Keep safety glasses nearby. Fine wood dust is easy to underestimate.

Materials depend on the wall. Prepare a properly sized wooden shelf, brackets, screws, wall anchors, and washers. Choose screws according to the wall type and bracket holes. For drywall, anchors should match the stated load rating. For masonry, use masonry bits and compatible plugs. A stud-mounted shelf is usually more dependable. Many residential studs are spaced about 16 inches on center, but measuring is safer than assuming. I once trusted a stud finder too quickly and mounted one bracket slightly off-center. The shelf held, but the result looked careless.

The Joint Center for Housing Studies’ 2024 Leading Indicator of Remodeling Activity projected nearly 485 billion dollars in homeowner renovation spending through early 2025. That spending reflects a large repair market, yet small projects still need professional habits. The U.S. Consumer Product Safety Commission repeatedly highlights furniture tip-over risks, so secure tall shelving and heavy loads carefully. Place heavier objects low, tighten every screw, and check the level before final tightening. Do not rely on anchors alone for a heavily loaded shelf. That shortcut deserves reconsideration. Leave a small clearance from doors, heaters, and electrical fixtures, then test the shelf with gradual weight rather than one sudden load.

How to Install a Wooden Shelf What Tools Do You Need? - Tools and Materials Needed for Installing a Wooden Shelf

Category Tool or Material Recommended Specification Typical Quantity Primary Use Important Note
Measuring Tape Measure At least 3 m (10 ft) long 1 Measures shelf length, bracket spacing, and mounting height. Measure twice before drilling.
Marking Pencil Hard or medium graphite pencil 1 Marks stud locations, hole centers, and shelf position. Use light marks to reduce wall damage.
Alignment Spirit Level 30–60 cm (12–24 in) level 1 Checks that the shelf and brackets are horizontal. Check level before fully tightening screws.
Stud Detection Stud Finder Electronic or magnetic wall-stud detector 1 Locates framing members behind drywall. Confirm the location with a small pilot hole.
Drilling Drill or Driver Corded or cordless drill with adjustable speed 1 Drills pilot holes and drives mounting screws. Use the correct bit for the wall and screw type.
Drilling Drill Bits Wood bit and masonry bit; commonly 3–8 mm 1 set Creates pilot holes in wood, drywall, brick, or concrete. Match the bit diameter to the anchor instructions.
Fastening Screwdriver Bit or Screwdriver Phillips or slotted bit matching the screws 1 Tightens screws into brackets, studs, or wall anchors. Avoid overtightening, which can strip the screw or damage drywall.
Shelf Support Shelf Brackets Two brackets for short shelves; add support for longer or heavier shelves 2 or more Supports the shelf and transfers its load to the wall. Choose brackets rated for the expected load and shelf depth.
Fastening Wood Screws Length suitable for the shelf thickness and bracket holes 4–8 Secures the wooden shelf to the brackets. Screw length should not pass through the shelf.
Wall Fastening Wall Anchors Anchors rated for the wall type and intended load 2–6 Provides support when a screw cannot enter a wall stud. Do not use drywall anchors for loads beyond their rating.
Shelf Material Wooden Shelf Board Dry, straight board with suitable thickness and depth 1 Forms the usable storage surface. Inspect for cracks, warping, and loose knots before installation.
Finishing Sandpaper 120–180 grit for smoothing edges and surfaces 2–4 sheets Removes splinters and smooths cut edges. Sand with the grain and remove dust before finishing.
Protection Safety Glasses Impact-rated eye protection 1 pair Protects eyes from wood chips, dust, and drilling debris. Wear during drilling, cutting, and sanding.
Protection Dust Mask Particulate-filtering mask suitable for wood dust 1 Reduces inhalation of fine dust during sanding or drilling. Work in a ventilated area and clean dust after installation.

General planning guide: A short, lightly loaded shelf may use two brackets fixed into studs or correctly rated wall anchors. Longer shelves and heavier loads generally require additional brackets, stronger fasteners, and support positioned according to the shelf and bracket manufacturer’s load guidance.

Choosing the Right Location and Measuring the Wall

Choosing the right location is more important than drilling the first hole. Study the wall’s daily use, nearby doors, windows, switches, and furniture. A shelf above a desk should remain within comfortable reach. A shelf near a walkway needs enough clearance for shoulders and passing objects.

Gather a tape measure, pencil, spirit level, stud finder, drill, suitable screws, and wall anchors. Measure the shelf length and mark its center on the wall. Then measure upward from the floor or a nearby reference point. Check this height from several angles. It may look balanced on paper but feel awkward in the room.

I once installed a shelf beside a window without checking the frame. The brackets fit, but the curtain could not move freely. Measure the bracket spacing too, not just the shelf itself. Locate studs whenever possible, because they provide stronger support. If studs do not match your marks, use anchors rated for the wall material and expected load. Drill a small pilot hole first. It reduces splitting and helps the screw stay aligned. Hold the level against every mark before drilling. Nearly level is not level. Leave a little space around the shelf for cleaning and small adjustments. A second check feels slow, but repairing a misplaced hole takes longer.

Marking the Shelf Position and Stud Locations

When installing a wooden shelf, accurate marking matters more than fast drilling. I use a tape measure, spirit level, pencil, stud finder, and masking tape. Choose the shelf height according to its purpose, not appearance alone. A display shelf may sit higher, while a daily-use shelf should remain easy to reach.

Hold the shelf against the wall and check its position from several angles. Place a small pencil mark at each end, then draw a light level line between them. Keep the line faint. Dark marks can remain visible after the shelf is installed.

Scan the wall for studs, moving the stud finder slowly across the proposed shelf area. Mark both edges of each stud, then identify its center. Stud spacing can vary, so never assume a fixed pattern.

Measure twice. Drill once.

I usually confirm the marks with a thin probe or a gentle tap, but tapping alone can mislead me near corners or plaster repairs. My first layout is rarely perfect, and I sometimes shift the shelf by a few millimeters after checking the room. That small adjustment can prevent a crooked appearance.

Avoid marking where hidden wiring or plumbing may pass, especially near switches, outlets, and water fixtures. Keep the pencil marks visible until the brackets are secured and the shelf sits level.

Installing Brackets and Securing the Shelf

Before touching the shelf, gather a tape measure, pencil, level, drill, screwdriver, and suitable wall anchors. A stud finder can locate stronger fixing points behind drywall. Measure the shelf length and mark bracket positions evenly beneath it. Keep the brackets slightly inward from both ends. A level matters here. Small errors show.

Choose anchors according to the wall material and the shelf’s expected load. For drywall, fasten brackets into studs whenever possible. If studs are unavailable, use rated hollow-wall anchors designed for the shelf’s weight. Masonry walls need appropriate masonry plugs and a suitable drill bit. Never rely on a loose, undersized anchor. Hold each bracket against its marks, then check the vertical alignment before drilling pilot holes. This reduces wandering and prevents cracked plaster.

Drive the screws firmly, but stop when the bracket sits flat. Over-tightening can strip the hole or bend thin metal. Place the wooden shelf on the brackets and center it carefully. Check the level from front to back and side to side. Secure the shelf through the bracket holes with short wood screws, choosing lengths that will not pierce the top surface. I once rushed this step and left a visible bump in the wood. It looked minor until light crossed it. Test the installation with gentle downward pressure before adding books or dishes. Recheck every screw after a few minutes, because wood can settle slightly. I still question whether perfectly even spacing is always necessary; solid support matters more than appearance, but both deserve attention.

Checking Stability and Making Final Adjustments

Checking stability is the part many installers rush, but it determines whether a wooden shelf remains safe. After mounting, place a spirit level across the shelf and along its front edge. Press each corner gently with one hand. It should not rock, twist, or pull away from the wall. It can still wobble.

The U.S. Consumer Product Safety Commission reported 71 furniture tip-over deaths from 2018 to 2020, including children and adults.

That data supports a careful final inspection, even for a small shelf. Check every screw for movement, then test the wall fixings by applying gradual downward pressure. Do not jump straight to the maximum load. Add books in small groups, keeping heavier items near the brackets and close to the wall. A shelf that holds today’s weight may loosen after repeated use. That is easy to overlook.

Look for hairline cracks around the screw holes, crushed wood, or a bracket that sits unevenly. If the shelf tilts, remove the contents before adjusting anything.

Recheck the wall surface, bracket alignment, and fastener grip. In my experience, a tiny adjustment often prevents a larger repair later.

Still, personal inspection has limits. If the wall material is uncertain or the shelf will carry substantial weight, consult a qualified installer and follow the fixing manufacturer’s tested load guidance.

FAQS

What tools are needed to install a wooden shelf?

Gather a tape measure, pencil, level, drill, screwdriver, and suitable wall anchors. A stud finder can locate stronger fixing points.

How should bracket positions be marked?

Measure the shelf length and mark brackets evenly underneath. Keep them slightly inward from both ends. Small errors show.

Which anchors suit different wall materials?

Use studs in drywall whenever possible. If unavailable, choose rated hollow-wall anchors for the expected load. Masonry requires suitable plugs and drill bits.

How can drilling mistakes be reduced?

Hold each bracket against its marks and check vertical alignment. Drill pilot holes carefully. This helps prevent wandering and cracked plaster.

How tightly should bracket screws be installed?

Drive screws firmly until the bracket sits flat. Avoid over-tightening, which can strip holes or bend thin metal.

How should the shelf be secured to its brackets?

Center the shelf carefully and check its level in both directions. Use short wood screws that will not pierce the top surface.

How can shelf stability be tested?

Place a level across the shelf and its front edge. Press each corner gently. It should not rock, twist, or pull away.

How should weight be added after installation?

Test with gentle downward pressure first. Add books in small groups, keeping heavier items near the brackets and wall.

What warning signs require adjustment?

Watch for hairline cracks, crushed wood, loose screws, or uneven brackets. Remove all contents before correcting a tilted shelf.

When should professional help be considered?

Ask a qualified installer when the wall material is uncertain or the shelf will carry substantial weight. Tested load guidance matters.

Conclusion

Installing a wooden shelf is a straightforward DIY project when you plan each step carefully. What tools are needed for DIY wooden shelf installation? Usually, you will need a measuring tape, pencil, level, drill, screwdriver, suitable screws, wall anchors, brackets, and safety equipment. Before starting, choose a location that is practical and free from obstructions. Measure the available wall space and confirm that the shelf will fit comfortably without interfering with doors, windows, or nearby furniture.

Next, mark the desired shelf height and use the level to draw a clear reference line. Locate the wall studs and mark their positions so the brackets can be attached securely. Install the brackets evenly, using appropriate anchors when studs are unavailable, then place the shelf on top and fasten it according to the bracket design. Finally, check that the shelf is level, stable, and firmly attached. Make any necessary adjustments before placing items on it, and avoid exceeding the shelf’s intended weight capacity.

Liam

Liam

Liam is a dedicated marketing professional with a profound expertise in the industry, where he excels at highlighting the unique advantages of our core products. With a keen understanding of market trends and consumer needs, Liam frequently updates our company’s professional blog, providing......