Scratches on a polished wooden table can be frustrating. They diminish the beauty and value of the furniture. Many people wonder, "How to fix scratches on a polished wooden table?" Understanding this process can restore the table’s charm.
In this guide, we’ll cover practical methods to repair those unsightly marks. From using common household items to specialized products, each technique has its merit. It's essential to recognize that repairs may not be perfect. Sometimes, a slight imperfection makes your table unique.
By following the steps outlined here, you can effectively minimize scratches. Remember, each method may require patience and effort. Your commitment to the repair reflects your love for your wooden table. Let’s explore these solutions actively and confidently.
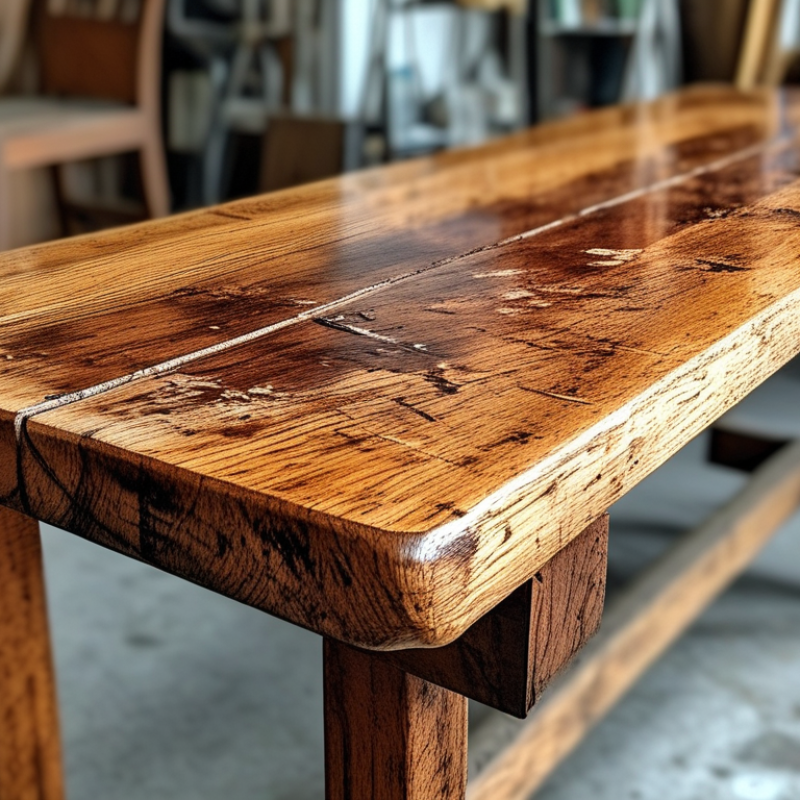
When dealing with scratches on polished wooden tables, identifying the severity of the damage is crucial. Surface scratches typically are lighter, affecting only the finish. However, deeper nicks can penetrate to the wood layer. According to industry studies, about 40% of furniture damage comes from scratches. Understanding the depth helps in choosing the right repair method.
For minor scratches, a gentle touch can work wonders. Try using a soft cloth and lemon oil to restore shine. If the scratch is more visible, consider using a wood filler that matches the table’s color. Apply it carefully and sand lightly for a smooth finish.
Tips for detection include examining the scratch under a bright light. This can reveal its depth and extent. For deeper scratches, it may be wise to consult with professionals. Even with DIY repairs, results can be imperfect. Misjudging the color or finish could lead to mismatched areas. Make sure to test any product on a less visible spot first.
When repairing scratches on a polished wooden table, having the right tools and materials is essential. A study by the American Wood Council indicates that over 30% of wood furniture suffers from surface scratches. This damage can significantly affect the table's aesthetic appeal. Essential tools include fine-grit sandpaper, wood filler, and a soft cloth. Fine-grit sandpaper smooths scratches without removing the finish. Use it carefully to avoid creating new scratches.
Wood filler is crucial for deeper grooves. Choose a filler that closely matches your table's color. Apply it with a putty knife, ensuring it fills the scratch completely. After it dries, sand the area gently to blend it into the surrounding surface. A microfiber cloth is perfect for cleaning the area without leaving lint behind.
Sometimes, even with the best materials, the repair won't be flawless. It may require multiple coats or touches. Surface tension issues can cause some fillers to shrink, leaving tiny gaps. This requires patience and repeated effort. A report by the National Wood Flooring Association shows that even professionals often revisit their repairs. Embracing imperfections can lead to learning and improvement in technique.
Repairing shallow scratches on a polished wooden table can rejuvenate its appearance. Many homeowners encounter this issue, but addressing it is quite manageable. To start, you will need a few materials: a soft cloth, wood repair wax or a matching marker, and some polish.
Begin by cleaning the scratched area with a gentle cleaner. This removes any dust and grime. After ensuring it is dry, use the wood repair wax or marker. Apply it directly to the scratch, filling the damaged area. Take your time here; a rushed approach may lead to uneven results. Use the soft cloth to blend the repair into the surrounding wood. Lightly buff the area for a smoother finish.
Finally, apply a coat of wood polish. This not only enhances the overall look but also provides protection. It is vital to remember that each scratch can be different. Some may require repeated applications before achieving a seamless look. Consider the grain of your wood, as it may affect the repair’s effectiveness. Be patient and reflective about the process. Adjust your technique as needed to suit your specific situation, embracing the learning journey of maintaining your furniture.
Deep scratches on a polished wooden table can be frustrating. They disrupt the beauty of the wood and can make it look worn. Fortunately, several techniques can help you fix these damages effectively.
One popular method involves using wood fillers. Choose a filler that closely matches your table's color. After cleaning the area, apply the filler with a putty knife. Fill the scratch carefully, ensuring it's level with the surface. Let it dry overnight. Sand the area gently until it's smooth. This process takes patience. Sometimes, the color may not match perfectly. Don't be discouraged. You can always try again.
Another technique is using a blend of olive oil and vinegar. Mix equal parts and apply the solution to the scratch. This mixture can enhance the wood's appearance and sometimes minimize the visibility of the scratch. Let it sit for about 30 minutes before wiping it off. However, the results can vary. Not every scratch will disappear entirely. The process reminds us that while perfection is the goal, it's okay if the finish is not flawless. Textures and stories in wood make it unique. Embrace those quirks.
| Technique | Materials Needed | Steps | Effectiveness |
|---|---|---|---|
| Wood Filler | Wood filler, Putty knife, Sandpaper | 1. Clean the area. 2. Apply wood filler with a putty knife. 3. Allow to dry. 4. Sand smooth. |
High |
| Wax Crayon | Matching wax crayon, Soft cloth | 1. Choose a wax crayon similar to the wood color. 2. Rub it into the scratch. 3. Buff with a soft cloth. |
Medium |
| Olive Oil and Vinegar | Olive oil, White vinegar, Soft cloth | 1. Mix olive oil and vinegar in equal parts. 2. Apply to the scratch with a soft cloth. 3. Wipe off excess. |
Low |
| Furniture Marker | Wood furniture marker | 1. Select a marker that matches your wood color. 2. Color in the scratch directly. |
Medium |
| Sand and Refinish | Sandpaper, Varnish, Brush | 1. Sand the scratched area. 2. Clean the dust. 3. Apply varnish. 4. Let it dry. |
Very High |
To protect polished wooden tables from scratches, consider implementing several practical strategies. Start by using coasters for drinks and placing mats under items. This creates a buffer between surfaces and prevents direct contact. Additionally, avoid sliding objects on the table. Instead, lift them when moving. Small actions like these can prevent significant damage over time.
Regular maintenance is key. Dust and polish your tables frequently to maintain the finish. Use a soft cloth to avoid scratches during cleaning. Even minor dust particles can act like sandpaper when rubbed. Pay attention to the legs of tables, as they can also scratch surfaces unintentionally.
Consider the placement of the table. Position it away from high-traffic areas. This reduces the risk of accidental bumps or scrapes. Be cautious with toys and sharp objects in the vicinity. Awareness of your environment can significantly reduce wear and tear. Reflect on your habits and make adjustments for better care of your wooden furniture.
This chart illustrates the time required to repair scratches on polished wooden tables, the number of preventative measures that can be taken to reduce scratches, and the average number of scratches observed after regular use. These insights help in understanding the maintenance required for polished wooden tables.
: Examine the scratch under bright light. Surface scratches affect only the finish, while deeper ones penetrate the wood.
Use a soft cloth with lemon oil to restore shine. It’s an easy way to enhance the table's appearance.
Consider using a matching wood filler. Apply it carefully and sand lightly for the best finish.
Clean the area first, then use wood repair wax or a matching marker. Buff lightly for a smoother look.
If unsure, consulting a professional can help. DIY repairs may lead to mismatched areas if misjudged.
Each scratch is unique. Some may require multiple applications for a seamless look. Take your time.
Yes, a mix of olive oil and vinegar may minimize visibility. Results will vary; perfection isn't always attainable.
Embrace imperfections. Wood has textures and stories that make it special. Adjust techniques to fit your furniture's needs.
Don’t be discouraged. You can always try again to achieve a closer match. The journey of repair is insightful.
Yes, cleaning removes dust and grime. A clean surface improves the effectiveness of your repair efforts.
To address the question of "How to fix scratches on a polished wooden table?", it is essential to start by assessing the severity of the scratches. This initial evaluation will help determine the appropriate repair methods. For minor scratches, common tools such as wood fillers, touch-up markers, and soft cloths can be sufficient. The process involves cleaning the area, applying the filler, and using a finishing polish to restore the shine.
In contrast, deep scratches may require more advanced techniques, including sanding and using a wood stain to blend the repair into the surrounding finish. Additionally, implementing preventative measures such as using coasters, placemats, and regular maintenance can protect polished wooden tables from future damage. By following these guidelines, one can effectively restore the beauty of wooden furniture and minimize the impact of scratches.

TayLord Furniture